Posted on

Model HO White Pass & Yukon Route Train Set

I have here the beginning of what will eventually become my model HO White Pass & Yukon Route train set. I am posting this as yet another HJR Train Project that is in its beginning phases.

The Impetus

I visited Skagway, Alaska in 2022 and will eventually have a Travel article up detailing that adventure. For now, just be aware that before that adventure, I didn’t know the White Pass & Yukon Route railroad was even a thing. Well, it is. And it has some significant implications and importance for and to Alaska, plus it makes for a great tourist attraction. Wait until you read about my experiences on the real passenger train. Believe me, it was awesome.

When I arrived and took my ride on the real railroad, the railroad had just received a new fleet of stunning looking Diesel locomotives (or so I thought), which I got to see from various distances. (View my onboard videos when they get posted to see exactly what I mean.) When I returned home, I was inspired by those locomotives because then and still up to now, a year later, no model manufacturer has made a replica of the new White Pass & Yukon Route Diesel locomotives. Although I contacted the manufacturer, NRE, of the real diesel locomotives many months ago, they failed to respond to me. I inquired with them to see if I could get a peek at the actual schematic diagrams of the locomotives that were delivered to Alaska because I wish to try to reproduce a 3-D printed shell of the design and try to make it fit on a similar and existing HO model diesel chassis, thereby giving me a Sound Equipped HO scale operating model of the real, newly received, WP&YR locomotives. Therefore, that is part of the goal of this project, which is to end up with an HO scale replica of the real train that I road on during my visit to Skagway, AK.

Step 1.

I will start with the 4-passenger car set that I purchased from the White Pass & Yukon Route Train Shoppe at the depot in Skagway. As soon as I stepped off the train and started a video recording, I made a bee line towards the train shoppe. I bought some post cards, which is one of my things to do on trips and vacations, and I bought the HO scale, Athearn Collector’s White Pass & Yukon Route Overton 4-piece Passenger car set, model #: RND99158. They had a steam locomotive for sale there too, but you may have heard me say in many of my videos that I have been trying to reduce my collection of Steam Era Locomotives. So, I didn’t wish to add another one. Upon buying the items, I had the train shoppe ship the items to me (find out why in the travel section when this adventure gets published).

The White Pass & Yukon Route (WP&YR) railroad in Skagway is not the only train that I encountered or road on in Alaska. It is also not the only train I bought in AK. I also road on the Alaska Railroad from Anchorage, AK to Stewart, AK. In fact, I did that first just several hours after arriving in Alaska by airplane. As you might have guessed, I also have and am putting together some Alaska Railroad train sets (plural) to commemorate my ride on that train as well. (More on this in both the travel section and numerous posted videos of the Alaska train sets elsewhere on this site.)

My WP&YR train set will probably only have the 4 passenger cars in it, unless someone produces more cars with different road numbers, or unless I find a stealer deal on the same set again as time marches on. Maybe I will buy one more single car and number it the same number as the car I road in. Additionally, I hope to build at least one locomotive that matches the newly delivered fleet of locomotives that arrived in July of 2022 [this is corrected later in this post] at the WP&YR railroad. Right now, I’m thinking that a Kato HO scale P40 or P42 Diesel Engine would make a good base underneath the shell, but such a locomotive would have to have the sound added separately as Kato typically doesn’t produce sound-equipped models. I could use someone else’s P40 or P42 sound equipped model. I actually already own 1 of each type dressed in the Amtrak phase I or phase III paint scheme (3 thick red, white, & blue lines). However, these are much older Athearn Blue Box models that are as heavy as bricks and may not easily be converted to DCC Sound. Plus, they consume enormous amounts of power. So much so that it is almost impossible to get both locomotives to run in DC mode on my Libraryville layout. These 2 locomotives were acquired in April of 2018 from a vendor at the Hickory Train Show in NC. I have test run them, videoed them, and stored them. They have less than 30 minutes of runtime on them during their life, but I just don’t think they will make a good FIT for underneath the shell of my WPYR locomotive. First, I need to get a look at the blueprints or some similar diagram of the real locomotives with measurement details.

Step 2: Research

I took the liberty while creating this post to invest 2 more hours doing some more research. Apparently, I remembered a few things differently or incorrectly from my previous research and even though some of my notes state that I downloaded some copies of pictures and things during the previous research phase, I couldn’t find those today. Anyway, I made some more copies and some more notes. One thing I remembered differently was that the front of the 6 new NRE locomotives had a deeper slant similar to the P40’s I mentioned. It is not that steep and a lot shorter. Also, the NRE’s have C-C (3 axles per truck) arrangements instead of B-B (2 axles per truck), so the P40’s will not be a good fit for my model version. Additionally, I know I read that the newest locomotives were delivered in July of 2022. However, today’s research shows actual removal of the covering began as early as July of 2020 with the last 2, #3005 and #3006, being unloaded from a barge on October 12, 2020. Also, there are some discrepancies as to which PAINT SCHEME will be the official paint scheme used on the 6 new models. I show that at least 2, #3001 and #3002, are painted two-tone Yellow and Green with Black lettering, but the remaining 4 still appear to be Black with Red and White lines and White lettering, as they were delivered. I actually like the Black paint scheme better and I confirmed that the train I was on was at least pulled by a Black locomotive. However, I didn’t get to see the exact road number on it. I have deduced though, that the road number has to be #3004, because 3001 & 3002 were Yellow & Green, 3003 we passed on route to the summit, and 3005 & 3006, were on track sidings in my photos. I’m not sure if there was a locomotive on both ends of the train that I was on. I confirmed the number of passenger cars in my train by counting them (and apparently, I asked, or it was stated by the on-train tour narrator) in one of my videos to be a total of 14. That video shows that we parked in front of the depot, but a Yellow & Green locomotive was on the other side of a crossing that may have either previously been connected to the train I was on, or it is possible the railroad was about to connect it to the train and taxi the train closer to the onboarding area.

I correctly remembered that NRE, National Railway Equipment Company, doesn’t have a diagram, specification sheet, or any other information on their website for the EXACT model E3000CC-DC equipped with a 16-645-E3C engine. They do have diagrams for E3000C locomotives with 16-645-E3B engines. The CC-DC models are what all 6 of the new WP&YR locomotives have in them.

Also, for some reason, thedieselshop.com has dropped the “R” from the railroad’s name / reporting mark and refer to them as “WPY”. I am not sure why yet. Of course, the new locomotives simply have “White Pass” lettered on the side of them, including the quote marks.

The NRE diagrams for the E3000C show a boxy locomotive that is not a match for the slick, slanted, front cab locomotives delivered to WPYR. So, I am going to send them another email tonight again requesting a specification sheet, diagram, or possible blueprint, and maybe even some CAD files, especially if they do not intend to manufacture another of those locomotives, to see if they will allow me to try to reproduce one for my model railroad.

An Unexpected Issue

The other reason for posting this page today is that all week I have been gearing up to report my WP&YR passenger car #211 problems to Athearn. It hasn’t worked right since I opened the box in late June 2023. Car #211 keeps sporadically derailing, and the issue has to be the car as the other cars do not derail. See the Model North Carolina Piedmont Service video where I talk about the issues I have with it while pairing it with 2 Athearn RNCX locomotives.

Today, August 17th, 2023, I pulled out the Athearn WPYR Collectors set again this afternoon after lunch because I wanted to take snap shots of the trucks and wheels that are causing car #211 to malfunction. However, I couldn’t really determine which axle was the worst. So, I put the car on the tracks and hand-rolled it to see if it would come off the tracks. It did, but I couldn’t consistently make it happen or determine the real cause. So, I pulled all the cars out and Consisted them. I hand-rolled them all to see what the problem was. If was hard to tell. Sometimes #211 came off the tracks and sometimes it didn’t. So, I connected my Kato UP4301 SD40-2 Diesel Engine to them (because it was sitting on the tracks at the engine service facility and has knuckle couplers on it).

UP4301 pulled the passenger cars around the tracks with #211 right behind the locomotive. Occasionally, the car would derail. I moved the car to the end of the consist. It didn’t derail. I put it right before the end observation car. Again, it only derailed every so often but most of the time it had a good run on the top loop. I sent it downtown to the bottom loop and on the way down it derailed. It had trouble making it around the backend of the bottom loop. I tried that again and the same thing happened after car #211 derailed twice getting back around to the same spot. I took it off the tracks. I put it down on a table and noticed that it almost seems like the bottom frame is slightly warped or something is wrong with the stabilization of the trucks (maybe both trucks).

Car #211 doesn’t sit perfectly level on all 8 wheels. At least 1 and sometimes 2 wheels on 1 truck are off the flat surface when the car rest on its own. I tried forcing the car downward with pressure and rolling it on the table back and forth to see if that would flatten it out. It didn’t take when I lifted my hands off the car. It still had the same issue. I took some pictures of the entire set unopened but no pictures of the individual cars or car #211. I added these pictures to my collection of pictures of a set similar that I downloaded from the Internet whenever I originally cataloged the set into my train collection spreadsheet / workbook. The pictures I acquired from the net were taken by someone else and the packaging of that set is different / older than my set. My set is newer because pricewise, my set is $60 more than the older set (due to inflation no doubt). The older set has the Roundhouse name on it whereas my set has Athearn’s name on it. So I never did get around to taking pictures or making a video of car #211 derailing time and time again.

I estimated the time I spent examining car #211 and trying to figure out the issues again to be about 30 minutes because I forgot to track the exact start and end times. I had to stop and take a mid-day nap after that as I didn’t get much sleep last night. So, I left all but car #211 on the tracks. I will repackage them tonight and return them to their storage place. [I did put them away around 11:30 pm August 17th, 2023.]

As you can read, my project is off to a slow and jagged start. I really need Athearn to offer me some repair options so that I can get car #211 fixed. My goal for today is to submit my request via their online form before I go to bed tonight. So, if I can get the 2 communications done tonight and the set put back up, that is all I can do until I get answers back from Athearn and NRE. Meanwhile, I will have to keep looking around to see if there is a model HO scale sound-equipped 3 axles per truck diesel locomotive that is similar in shape to the real WPYR NRE E3000CC-DC locomotives. [Have to stop here. I must make dinner tonight and its 9 PM on the dot.]

Activity Log

Date / TimeActivity
2023-08-17
11:50 PM
I made it back around 11:50 pm to review and posted this page without the pictures, videos, and links. I did not get to the 2 form submissions. Then I went to bed about 1 AM.
2023-08-18
9:35 AM
I resumed editing and adding the pics and links. Once in place and other references tied in, I will submit forms to Athearn and NRE. All of this was completed successfully today by 7:53 PM.
7:22 PM & 7:52 PMReceived automatic response from Athearn. Then received another response from Athearn at 7:52 PM that suggested I either mail the entire set to them so they can review car #211 or contact the seller and ask them to replace it based on their normal return policies.

Also, around 7:50ish PM I submitted NRE contact form requesting E3005CC-DC specifications, CAD Files, Diagrams, or whatever assistance they could provide.
8:32 PMI forwarded Athearn’s 2nd response to the White Pass & Yukon Route Train Shoppe along with a message asking them if they still have any of the collector sets available and can they exchange my set.

Published: August 17, 2023: Last Updated: August 18, 2023.

Posted on

Model North Carolina Piedmont Service

Inspired by a train ride talked about by a previous member of the model railroad club that I am a member of, I decided that I would take a ride myself again on an American Passenger Train. I made this decision within minutes of seeing that member’s post on Facebook around 2020, if I remember correctly. One of my hobbies is traveling. I was spoiled with a ride on the London to Paris High-Speed Eurostar passenger train New Year’s Eve 2016. My previous passenger rides in the late 1990’s were interesting but they paled greatly in comparison to the luxurious ride aboard the super smooth, 186 mph Eurostar. I started giving American Trains another chance. I took a sleeper train via the Amtrak Texas Eagle from Chicago, Illinois to Dallas, TX in May/June of 2021. I rode on the Alaska Railroad and the White Pass & Yukon Rail in August of 2022. And finally, I took day rides from Charlotte to Raleigh and back again onboard the North Carolina Piedmont Service in December of 2022. I plan to put detail information up in a travel section on this site one day about all of these train rides. This article is about the HO scale model trains in my Train Collection that are commemorative of the North Carolina Piedmont Service. This article appears in the Projects section because to create a complete representative model of the Piedmont Service train that I rode on, currently, I will have to make that train set up, as no manufacturer has sold such a set thus far.

Although a consignor previously consigned 1 North Carolina locomotive for me to sell, I did sell it before I rode the Piedmont Service, and I wasn’t interested in having a Piedmont Service passenger set at that time. Since that time, I’ve ridden on the Service and I’m sort of getting into having models of the real trains that I get exposed to. So, the cost of two Athearn Sound Equipped models of the NC Department of Transportation (NCDOT) locomotives became reasonably affordable at one of the sellers that I like to get trains from. So, I purchased the 2 locomotives with road numbers that show-up on the actual train roster of the NCDOT as locomotives in regular operating service on a daily basis in the real world. Many people have written about the trains and the service. Here is a link over to The Diesel Shop that identifies the Motive Power real trains used in the Piedmont Service.

The 2 Athearn models that I have are in their “Ready To Roll” series. They come with Econami sound decoders. As you can see by the following photo, I obtained road# 1755 “City of Salisbury” and the road# 1797 “City of Asheville” models. The reporting mark for the railroad is RNCX. The part numbers of these 2 models are: ATH64731 and ATH64732 respectively. If you listen to the following video, you will hear me verbalize my comments, observations, and opinions about the models. These 2 locomotives will be used as the motive power for my Piedmont Service train set.

In order to complete the train set, I will need to dedicate 4 85′ Pullman smooth side Lounge/Baggage cars to this project. In order to stay true to what to what occurred in real life, I can use either Kansas City or Union Pacific passenger cars. I have a fleet of HO scale Union Pacific passenger cars already in my collection. I have several that are too large to operate on my current HO scale Libraryville layout. I haven’t made-up my mind yet as to whether or not I am going to keep those cars indefinitely or put them up for sale. Once I have the passenger cars, I will need to repaint them to match the Blue and Silver with Red pin stripe paint scheme that North Carolina passenger cars are using. I have enough photos and videos to get a great idea of where the borders of colors come together. I’ll do my best to match the colors with the colors found on the 2 Athearn locomotives.

I have seen videos of the Piedmont Service train taken by others. NCDOT or Amtrak seem to change up the number of passenger cars in the consist from time to time. In videos I have seen as few as 3 passenger cars per trainset and as many as 9 passenger cars in a set. I wasn’t able to locate any information that indicates how passenger cars are supposed to standard on a set or the methodology used NCDOT or Amtrak to determine how many cars should normally be in a trainset.

HO Athearn 2 NC DOT Locos with WP&YR Passenger Cars

In the above video, you will see that there are 3 old time Overton passenger cars between the 2 locomotives. These passenger cars are also made by Athearn and they were purchased minutes after I finished riding on the White Pass & Yukon Railroad in Skagway, Alaska. I purchased them as part of a Collector’s set directly from the White Pass & Yukon Route Train Shoppe. The Athearn Roundhouse series Collector’s set contains 4 Overton Passenger Cars. However, the 4th car in the set does not stay on the tracks. It derails quite often especially in curves. Although I bought the set in August of 2022, I just opened the set for the first time on June 30th. I’ve been on some additional trips and travels since I opened the set, and I am trying my best to get the video posted with this documentation so that I can include it when I contact Athearn to see if there is anything they can do or suggest that I do to try to repair the train car. It appears to me that the hole for one of the axles on one truck is either too deep or not properly aligned. As a result, the wheel keeps slipping out of the hole causing the car to lean which causes a derailment. I hope they can replace the wheelsets or bad truck if not the entire car. The road number of the damaged car is 211 and the model number of the set is: RND99158.

Moving forward with the project of completing a NC Piedmont Service train set, will start by me choosing the passenger cars to dedicate to this set. I recently purchased a new Bachmann Union Pacific smooth side dining car from ModelTrainStuff.com. I actually purchased the last one of those they had at the time. It had a problem very similar to what the 4th passenger car in the WP&YR Collector’s set has. I contacted ModelTrainStuff and they made arrangements with Bachmann to get me a new car. I just received word yesterday that they shipped out the replacement so it should arrive soon. I took pictures and videos of the original order and test run of the trains in that lot. I also documented what happened just as I am doing with this set of locomotives and passenger cars. In that set, were 2 other Bachmann Lighted Amtrak Full Dome passenger cars. I haven’t posted any of those pictures or videos as of this writing. I wasn’t that impressed with the Full Dome passenger cars simply because the lighting is less than optimal or representative of the real trains. It actually doesn’t look realistic at all. The Union Pacific dinner car on the other hand, is absolutely stunning in appearance and with its lighting. The matching series of Bachmann Union Pacific smooth side cars would be great as cars for this NCDOT Piedmont Service trainset. However, those cars are very expensive. So, I’m not sure if I want to put that much money into cars that I am going to have to repaint just to fit the NCDOT paint scheme. You may have noticed just like I did that up-close the actual real cars look 30 to 40 years old, have a lot of dings, scratches and imperfections in them. From a distance and while running 60 to 80 mph hour, they look pretty good. So, time will see what I do. Maybe another special will happen and the prices may be more reasonable. Otherwise, I’m going to have to find some USED passenger cars or use some of the USED passenger cars that I already have which would be the most economical thing to do. The Union Pacific passenger cars that I have that require 24″ radius curves or larger would seem to be the best option, except if I use those, I won’t be able to actually run the completed trainset on my own current layout. That wouldn’t be optimal for me. Additionally, ShowMyHobby.com train sales are down / practically nonexistent thus far in the 3rd quarter of 2023. If you’re viewing this and find some trains you like in the shop area, consider placing some orders to help me out. Or you can always donate via my donation page. Wouldn’t it be cool to see a model replica of the North Carolina Piedmont Service running on a model HO scale layout?

I also recently bought 5 or more used Athearn Bluebox Union Pacific passenger cars (mostly 3-axles per truck Corrugated cars) from eBay. These have turned out to be a huge disappointment. I talk a little about this in the consigned Denver & Rio Grande Diesel 7 car set that is up for sale. I do so because Athearn made that set too, and the offset bolster hole for those cars just doesn’t seem to work reliably on my 18″ and 22″ radius curves. The ones in the DRGW set manage to allow trains to run around my tracks. But the older Bluebox ones consistently derail, especially at the locations where I have “S-curve” like features. The cars are smaller than 85′ at somewhere around 65′ to 72′ long and you would think they would be able to handle 18″ and 22″ radius curves very well, but they just don’t. Also, because they are corrugated, I definitely cannot use them as UP repaints to NCDOT for this project. I’m holding on to them to see how they perform on the MMRR’s club layout next Spring.

Activity Log

Date / TimeActivity
2023-08-18ModelTrainStuff.com delivered the replacement Bachmann Union Pacific 85′ Diner Passenger Car today. I’m eager to check it out. I may pull out one or both of the RNCX locomotives and test pull that car and maybe 3 other 85′ Union Pacific cars to see how well they look and run on my layout, which would give me a reason to aim at getting 3 more of those Bachmann 85′ smooth side or streamlined passenger cars to be used for this project.
2023-08-19 2:30ish AMOpened newly received ModelTrainStuff.com RMA replacement Bachmann Union Pacific 85′ Smooth-side Diner Passenger Car #3610 {UP3610}. Quickly examined car and its axles. Saw power pickup swipers against inside of all wheels. I don’t think those were there on the car I sent back. If they were, they should have prevented the skewed axle on the first one. (Tired & sleepy so went to bed without testing with power.)
2023-08-19
7:08 PM-7:30 PM
I unpacked the 2 RNCX NC Locomotives and put them on the Libraryville layout tracks with the newly received replacement UP3610 Diner Passenger Car. I expected to do a test run, however, the coupler heights looked to me like they were going to be a problem. So, I took some photos of them with my coupler height tool, the 2 NCDOT locomotives and UP3401 Diesel engine. Then, I opened a package of Kadee couplers that I previously bought with the knuckle above the shank and installed 2 of them inside the new passenger car. I took more photos.
7:31 PM-7:53 PMI tested the new UP3610 Passenger Car between my 2 NCDOT F59PHI locomotives. It ran well with the new couplers on it, and it didn’t derail or come a loose. I also looked at it and the LED lighting is as good as the one I had replaced. I’m still not sure if the one I originally received had power swipers on the wheels.

I made a video of the trains running but I paused it in the middle to look for additional cars to match with the diner car. However, I discovered that I don’t have any that will match with this car. I also made the decision that I would buy 3 of the Bachmann 85′ Smooth-side Coach cars and paint all 4 of these cars in the RNCX paint scheme. When I ended the video, I prepared the other UP passenger cars for storage again. I had to stop and take a nap.

Later, while entering updates to the spreadsheet, I did some research to try to get a picture of the interior of the real RNCX Cafe car. I found and read a government report filed in November of 2013 that stated NCDOT converted the Cafe Cars on the Piedmont Service from a full cafe car with a fulltime attendant and hot meal service to being half vending car and half baggage car. There are 2 vending machines and 2 coke machines, plus sink, and trash receptacles, and coffee machines inside what used to be the Cafe cars now. This converted car which is more like a “Vending Machine Car” has been a success for NCDOT, so they plan to leave it that way. I’m not sure if the newly converted car was part of the consist that I rode on, but my guess is that it might have been especially since I CHECKED a bag which had to be stored somewhere. Furthermore, I am not going to replace the interior inside of the diner car that I have to try to match what NCDOT currently has. I didn’t find anyone’s photo(s) of what the Cafe/Vending car now looks like inside, and I personally didn’t try to access it on either trip that I took in December 2022.
2023-08-20 4:01 PM-7:15 PMMade 2 online train purchases today. I didn’t want to but felt like I needed to or would miss out on some items. One was 6 items to add to the HO Amtrak fleet and the other were the 3 Bachmann Union Pacific 85′ Passenger Cars that I wish to use with this project. I bought 3 of the last 4 that Trainworld had so these are getting scarce which was what I was afraid of. I didn’t want to pay as much as I did for them. I prefer to sell some trains online myself first and then buy what I can with my profits. I had to buy first this time though since online sales have been flat the past 2 months. Then I cataloged today’s purchases. I also verified that the passenger cars on the real Piedmont Service are shorter than the heights of the locomotives, which answers a question that I discussed in yesterday’s video.

Published: August 16th, 2023. Last Updated: August 21st, 2023.

My Libraryville HO Scale Layout

HO scale Libraryville layout

Today, May 4th, 2023, a Veteran on eBay asked me for some pictures of my layout so he could get some ideas about making his own layout one day soon. I realized that I haven’t shared the documentation behind my personal HO scale layout. While I really do not have the time at the moment to get into this, there is a lot that can be learned from my layout if I were to share all that I have learned while making it. I can tell you that as far as it has come, it is still a long way from being finished. But that seems to be on par with the layouts of most model railroaders. They remain a work in progress most of the times. That being said, check out the HJR Lonsway Pike, which is an N scale layout I bought and then enhanced. Originally, I was going to sell it since I didn’t need it, but I have grown so fond of it, I’ve decided to keep it. Plus, I believe it is now priced out of most people’s willingness to buy range. There is a third layout under construction that I REALLY am convincing myself that I am going to sell. It is currently called that U-Haul Box layout. I am documenting it but haven’t begun putting that documentation online yet. It too has a lot of great things in it, including a reverse loop. But alas, let me stop telling you about other things and try to quickly share a little bit about my Libraryville HO scale layout.

RELATIVE BACKGROUND

I could go on and on about my interest in model trains including when it first began, how I got into them as a youngster, my first couple of layouts, and when I put them away. I could also spend hours talking about when I returned to the hobby, why, and what led up to the creation of the Libraryville layout. And I truly should share a lot of that with you, but I am going to have to come back another day and give you all the nitty-gritty details. For now, I’m going to share a little with you about me so that you can get an understanding of WHY the Libraryville layout is what it is. This information may be useful to understand the creation of the Libraryville layout and the materials used in it.

I stopped playing with my trains around 1981, as I entered Highschool. I had an N scale layout that I removed in order to make room for my first home computer, a Commodore 64. This is a legendary pivoting point in my life. That change would put me on a path towards a great future with computers. However, it is my experience with the trains, wiring them up, and adding to my own layout as a youngster that served as very useful steppingstones to make my world of computers work for me.

I try to be a very FRUGAL person. I take good care of the things I buy. I always have. Growing up, I had many hobbies. After electric trains were given to me as Christmas gifts for 3 consecutive years, I took things from there and worked hard raising the money to support all of my hobbies. So, from the 5th grade forward when I acquired train items, I did so using my own money. I had to find ways to stretch a dollar as far as possible. Many fellow model railroaders have heard me talk about the days when I would wait until the day after Christmas, visit K&K Toy’s in the Eastland Mall in Gastonia, and buy trains for 50% off the regular price because they would mark them down the day after Christmas. I still have most of those trains and 95% of them are still in their original boxes which are also still in great shape. Sure, there are few trains that I destroyed as a child and teenager that are long gone, but most of them are still in my personal collection. In fact, the very first Steam Locomotive I received during the Christmas when I was 7 years old, I still have it. It doesn’t run. Somewhere between age 10 and 12, I custom painted it. To this day, I feel I did such a great job on painting it, that I have kept it around simply because the paint job to me looks totally awesome. I should tell you that I have a plastic model tank that I also built and painted about the same time that I still have as well simply because again, to me, I really put a great custom paint job on it too. The locomotive has been stored in tissue paper inside its original case all this time, while the tank car (a much larger scale than N scale) has been on display on shelves in various locations in my room for over 40 years. So, when I tell you that I try to take good care of the things I buy, I mean it. Being frugal has its advantages.

Now, let me fast forward and skip about 40 years of history. Along the way, I’ve developed some great negotiating skills. Don’t play me in monopoly, I almost always win, no matter who I play. So, it’s safe to say, I like a good deal and have learned how to negotiate my way into some excellent buys. The year 2010 arrived and I pulled my trains back out to create an N scale layout inside of a desk in my room. There are additional reasons for this which are another great story to share. It’s best if I tell it to you later, though. That layout also has not been displayed or documented on this site yet.

Skipping past several N scale layouts that I haven’t shared online yet, I discovered that a lot of things related to model trains changed during the 30+ years that my collection was stored in a military trunk in a closet. Inflation and technology increased tremendously. With HO, N, and most O scale trains as a youngster, if I wanted sound effects, I had to make those with my mouth. Sure, O and HO scales had some sound accessories available, mostly for blowing a whistle hidden in a structure somewhere. I had an O scale crossing gate that if I remember correctly, may have made bell sounds and flashed some lights when a train crossed over its pressure sensitive trigger. But that was about the extent of the Bells and Whistles that came with trains back in those days. The O scale trains disappeared (not on their own though) while I was away in college, along with my first original N scale layout. (The tale of how that happened is a tragic story, but another lesson learned about dealing with relatives.)

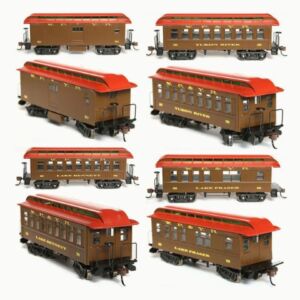
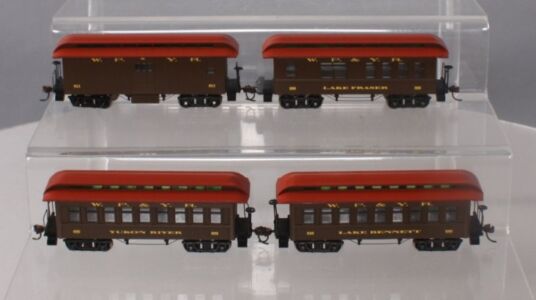
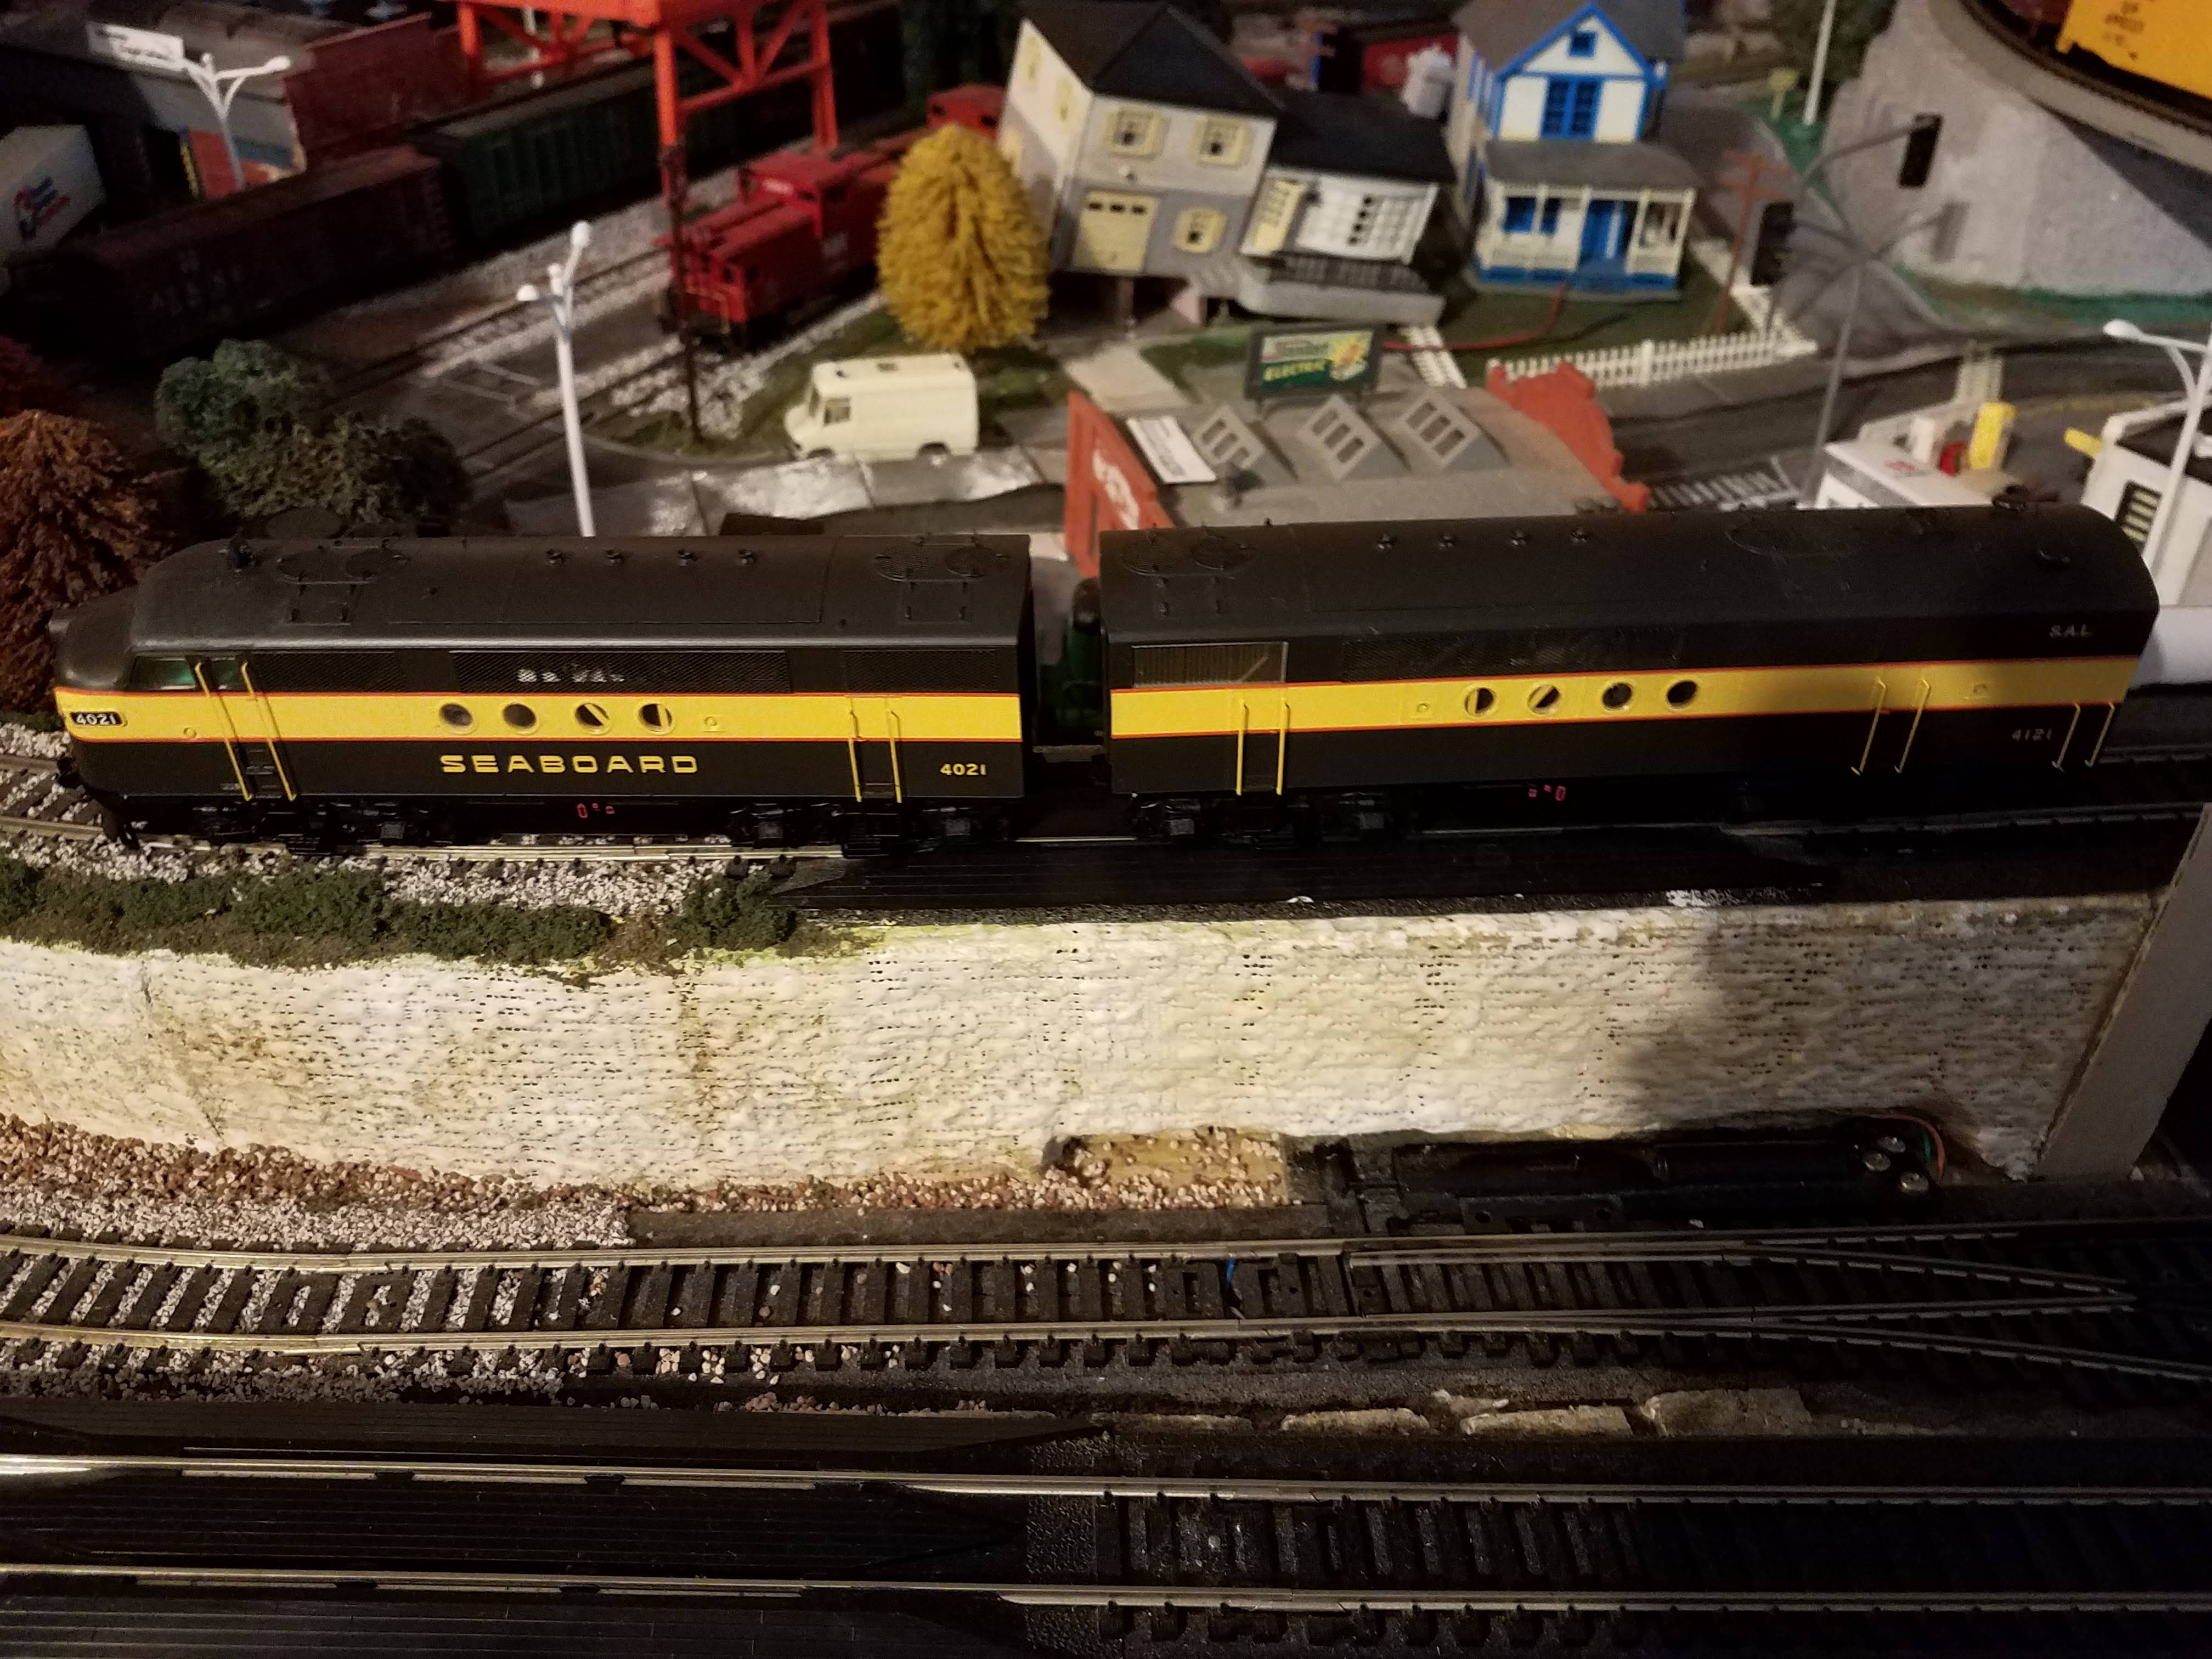
In 2010, I began looking for deals on tracks on Craigslist and eBay. I found them. And one lucky day, wanting my very first Sound enabled HO scale locomotive, I found someone selling a complete set of tracks and 1 Atlas Master Gold Series Norfolk Southern “Horse Head” DCC Dash 8-40C Diesel Engine Locomotive on Craigslist. Although the seller was interested in selling it all, I went primarily for the locomotive. Upon arriving, he explained his situation to me and we struck up an incredible deal for me and a fortunate opportunity for him. I left his place that day with everything I needed to build a very good layout and I had my first DCC Sound Equipped locomotive that makes all sorts of Sounds. I also received a new Digitrax Empire Builder DCC Command Station in that lot. If I told you how much I paid for all of that, it would make you cry. It was a fraction of the retail price, and it was practically all brand new. Many thanks to CW of Charlotte for letting me buy his train collection. However, this was not my first collection purchase. By this time, I had bought at least 3 other collections from hobbyists getting out of the hobby. If I can share any wisdom with you at all, finding a motivated seller of anything is the right person to buy something you want from.

I am extremely appreciative to the motivated model railroad sellers I have come across over the past 13 years. Thanks to them, I have grown my train collection immensely. The collection now needs a good permanent residence of its own and I am looking for motivated sellers of large storage buildings, craftsmen services, and building materials such as bricks, cement, steel, aluminum siding, roof tiles, and wood (2×4’s, plywood, sheetrock, etc.). If you have any of these items or services to offer at irresistibly low prices, please use my contact us page and let me know. Donations are also welcomed, including HO and N scale train donations.

DESIGNING THE LAYOUT

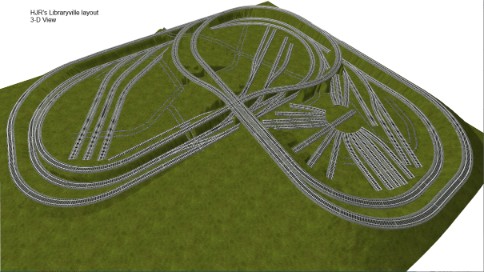
I have a room in my home referred to as the Library because it is full of wall-to-wall, floor-to-ceiling books, and memorabilia as well as file cabinets full of everything. After building the N scale Desk Layout, I decided to redesign the space in the Library. I used Google Sketch-up and digitized the interior of the room and then digitally recreated the room maximizing the space to take full advantage of an L-Shaped layout while still using practically all the wall space for books and train storage. The file cabinets have their space as well. This room is located upstairs in my house and the steps to it are extremely steep. They are so steep, there is no way to turn or twist a 4’x8′ piece of plywood to get it up the stairs in one piece. However, I can tilt a 4’x4′ piece of plywood and angle it to get it up the stairway. So, I set out to design a modular layout that could be built in my living room and then transported up the stairs and reassembled in the Library there. Hence the name, the Libraryville layout.

I then used train modelling software (that I would normally mention, however I’m trying to come up with a deal between me and the manufacturer that if I recommend their software, they pay me for doing so or at least send me a referral bonus or affiliate commission if my mentioning it results in the sale of it. Google Sketch-up is or was free so I mention it by name without such ambitions. I’ll see what I can do about getting commissions from their paid versions later, except I think a different company is handling that. I like version 8. Everything after that has been useless to me.) to design the Libraryville layout. I made over 10 different designs for the layout. All of the designs are based on the first HO scale layout that I bought from someone else off of Craigslist. His layout was “L”-shaped, but I quickly learned what motivated him to sell it or at least what frustrated him into selling it. And this is a lesson I will pass on to you.

I have noticed that many people trying to build layouts believe they can cut the costs of tracks by using Flex Track. While the concept is sound, one needs to be careful in the design phase of planning their layout. I have come across and have purchased several entire train collections because the sellers TRIED to make a layout using Flex Track and failed to properly account for the minimum radius concerns. In the case of the first HO scale layout I bought, the seller did a great job of following a plan that he found for making his layout benchwork. He even used screws instead of nails which made it easy to take apart and transport to my place. But when I asked him and later confirmed how he came up with the design for his layout, he said, he just started laying track and it all came together. Well, the Lip part of the L is where he completely messed up. Even the shortest of HO scale trains could not navigate the tight radius curves he had made to try to get the trains to turn around in that area of the layout which was part of his mainline. Therefore, he could have never operated a train or even 1 locomotive on his layout and get it to successfully run around his entire mainline. Although I purchased his layout intact with all the track and roadbed glued down to it, I disassembled the entire thing and salvaged what I could, except for the lumber. For over 10 years his board stood outside my home leaned against the wall. Some of it still remains. But I recently cut a piece off of it and used it for an outdoor project. He hand-laid about 1″ thick pink Styrofoam on top of his particle board. I have kept his Styrofoam which I had to cut a large mountain out of portions of it. I claimed the mountain plaster molding too. These items have been stored should a day come that I may need them. The N scale U-Haul layout is going to make use of some of the pink Styrofoam for a mountain base that will have homes under construction on top of it. I haven’t used the plaster mountain pieces yet. I have stored most of the flex track that he used and may have only used 1 full piece that I cut parts from to make one of the versions of the Libraryville layout.

After about the 4th design of the Layout, I made a mock-up floor model of the layout. This means I put down snap track pieces of the layout on the carpet in the living room to get an idea of how the digitally represented model actually looked when put together. In the earliest versions of the layout, I wanted to incorporate 2 major industries for which I had acquired buildings and other accessory parts to support. Those industries were a cement plant and a logging company. The cement plant would be a siding off the outer mainline and the logging plant was on a slanted and elevated curve that would be going through a mountain region. I created my own set of cardboard raisers to temporarily get the elevations of the track to points where I could test the layout. However, when I put that very long Norfolk Southern Dash 8-40C DCC Sound Equipped locomotive on the tracks to test it, it always had trouble navigating the sharp slanted curves near the logging facility. To make matters worse, the tracks were crossing the areas where my modular boards would have come together at 20 to 40 degrees and there was something like 5+ tracks connecting on 2 different levels across all 3 boards. The tracks crossing at the base would have been hard enough. The tracks crossing in the air at slanted elevations and curves would have been a nightmare to put back together after having built the modules. So, back to the train modeling software I went.

Version 6 was nice, and I left the floor design up for several months and played with that, but soon tired of the issues it introduced as well. Finally, I abandoned the idea of including the cement plant and a large wood processing company including a play-action log dump track and finished lumber company. Instead, I reduced the industries to a finished lumber facility, dry goods warehousing, passenger service, and freight distribution transportation services. I also added the round table and roundhouse acquired with the collection that the NS Dash 8-40C was in. I added an engine service facility. And I feel that when it comes to having good realistic elements in a layout, the following are necessities for me:

  • Major industries for the trains to service (which pay for the services offered by the railroad).
  • Passenger service (if possible) so that the average citizen can make use of the railroad.
  • One or more towns or cities and where possible a city should have at least the following buildings: A church, A City office Building, Homes and/or Apartments, A Restaurant, A Gas Station, and/or Convenience Store.
  • Homes indicating that people live near the railroads and in the towns.
  • Railroad facilities, including places to store trains that are not being used.
  • If possible, train maintenance or service facilities.
  • Roadways interconnecting the homes, businesses, industries, and railroad facilities.
  • As part of train storage there should be a train yard where trains are assembled (by the operator).
  • Industry spurs where trains pull next to the industry they service.
  • While point to point railroads are fare more realistic, I enjoy letting trains run on their own a lot of times instead of having to control and monitor them nearly every second, so for me, it is important to have a loop so a train can go around on its own. I’m a big fan of having multiple loops so that more than one train can be operating at the same time.
  • Trees, Lights, Telephone & Electrical Wires, and various elevations in the landscapes topography.

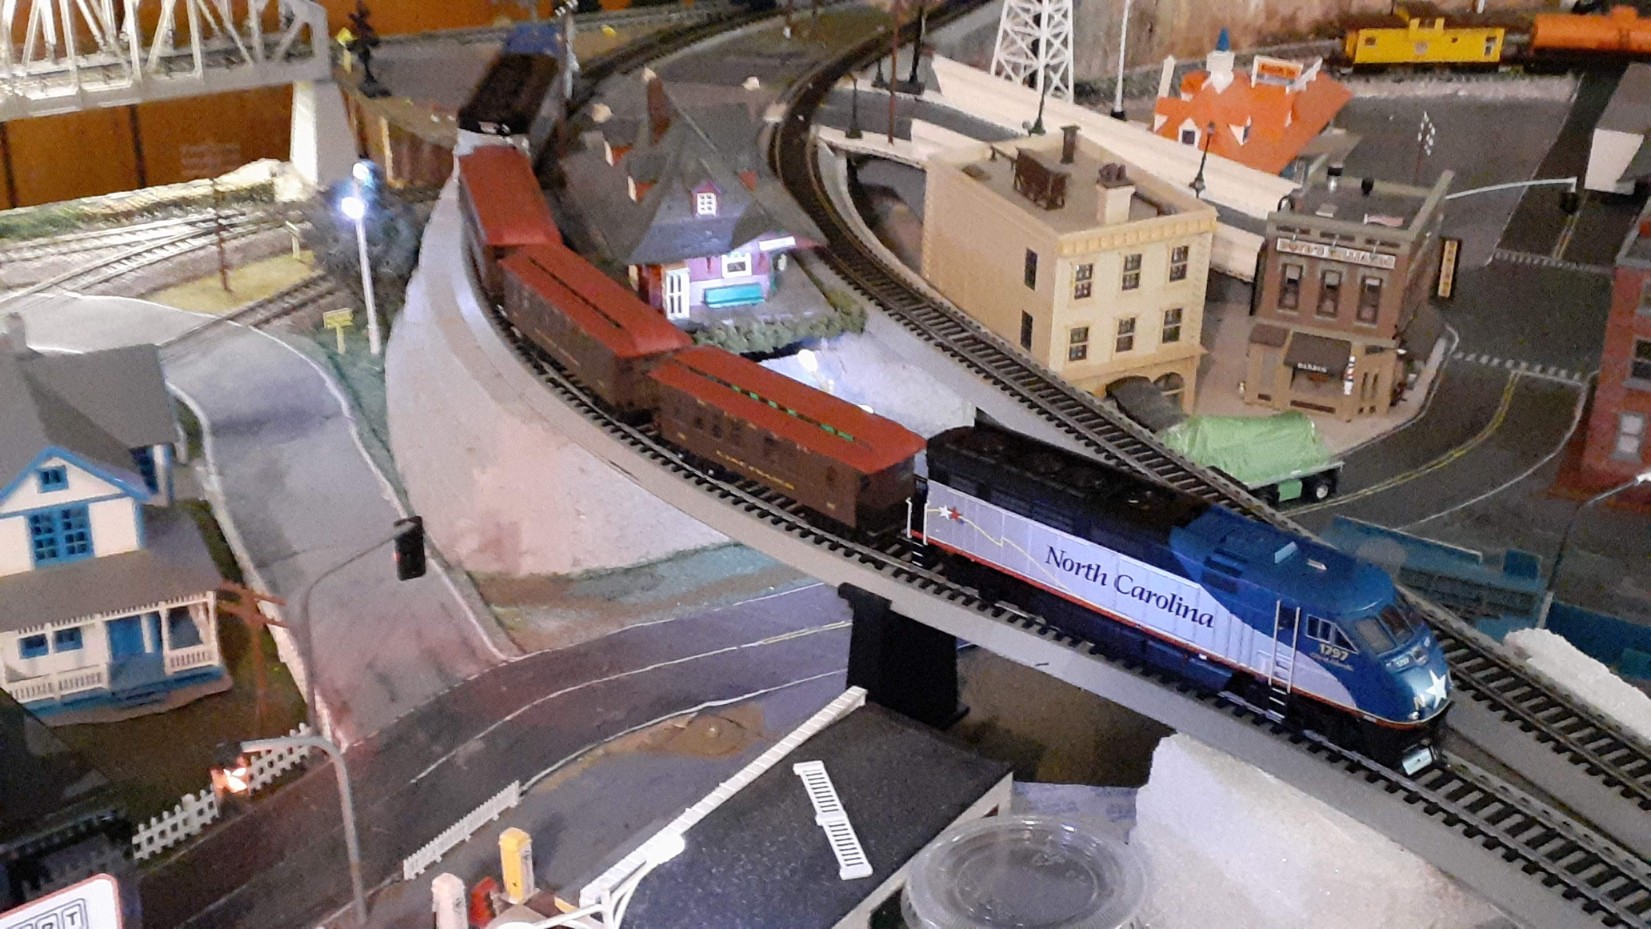
I eventually joined a train club (more on this elsewhere and later). Among the club members is a guy we call Chuck. Chuck says that a good layout should also include a Bridge somewhere. Thankfully, I included one without knowing this as I like to show areas of waterways and I like bridges too. The Libraryville layout has 3 that are easy to recognize, but it also has tunnels, mountains, and overpasses, which actually create 5 more bridges in reality.

I needed the Libraryville layout to have an “L” shape because of where it was going to go inside the library room. I can maximize the use of the room and the size of the layout as long as it is L-shaped. (Trust me, I played with several other designs including the possible use of a helix, but that was a waste of space for me and unrealistic for my modelling taste.). Because it would be L-Shaped, I like the idea of being able to have 2 trains run on separate loops at the same time. Of course, I also wanted to be able to traverse between the 2 loops any time I wanted and in whatever direction I wanted.

I felt I needed a mountain to hide my ups and downs from one loop to the next since those loops would have to be situated so that 1 loop was over top of the other loop at some point. The concept of the mountain also made it possible to have a tunnel. The Libraryville layout actually has a tunnel with FULL SCENERY inside of it. The Mountain can be lifted up and removed from the layout and the scenery with a smaller mountain inside of it reveals itself in the left rear corner of the layout. Although the layout is not yet completely finished, the idea is that the flat, slanted, Styrofoam platform that can be seen in most of the layout videos covered with a lot of track parts and papers, is to be the top of the mountain with a neighborhood community and a street running through the neighborhood. To tie it all together, the backdrop scenery that is to be painted (by me or a willing artist), is to show a scene that connects the road that goes up the bridge by the Passenger Station, out the back of the layout, around a drawn lake that shows under the bridge, and curves the road into the front entrance into the neighborhood. It is a beautiful scene in my mind, and I think I ruff-drafted (not to scale) and filed that draft away somewhere in my paper notes. The backdrop to the right will show more hillside and another city in the distance that the road going out the right-side rear corner alludes to going to. The scene to be painted on the side-drop on the right is to be mountain and sky, thus putting the entire layout in a valley. In the library room, the left-side of the layout butts up against a cloths rack so the mountain top will have a slight paper-thin painting to integrate that part into the environment. But all of the surrounding scenery is yet to come and has to be perfected once the layout is moved, that is, if it can ever be moved.

BUILDING The Layout

As I already mentioned, I laid test tracks down on my living room carpet of the several different versions of the Libraryville layout. I used my own home-made piers in some places, and I also used parts of Atlas and Bachmann pier sets at one point in time. Some versions I left up for a day or two and others for months. One Christmas came around and I extended that layout that I already had on the floor consisting mostly of Atlas tracks and then connected an entirely new oval of tracks with a spur, all of which I laid down on a large flat piece of cardboard, put my Christmas Tree up in the middle of it, and this was a major hit for my youngest niece. At the time, I had recently bought a Train Set that came with its own Sound Equipped transformer. It is a Walthers train set. (I should look up the name of it, but it’s getting pretty late as I write this line and I need to go to bed soon so I can get up early and meet with guys in our Metrolina Railroader’s club for breakfast and then spend the day manning the club’s layout in Spencer, NC (on May 6th, 2023). So, I’ll provide that name in a later revision.) Anyway, my young niece came over that Christmas and ran my trains and she had a wonderful time doing so. She loved pressing the sound effects buttons on the transformer which made appropriate noises on demand. After that Christmas, it would be the following Christmas when I took a couple days between Christmas Day and New Year Eve, visited Lowe’s, bought all the lumber and hardware that I felt I needed, returned home, and built the benchwork for my layout inside my living room. I cut all the boards that needed to be cut outside, but I assembled them inside. I may have even drilled a couple holes in the boards while inside. I know I installed the rolling casters on the 2’x4’s inside the house. But let me slow down a little bit and give you some details.

Again, I used Google Sketchup many months before to design every aspect of my benchwork. I created digital replicas of 2’x4’s. I had some that are 8′ long but most of them were 4′ long. Inside of Google Sketchup, I designed replicas of scrap pieces of wood that I obtained from a local cabinet maker. I can’t tell you what the actual scraps are made of because I really do not know the names of those pieces of wood. I simply measured what I had on hand and input the measurements into Sketchup to make pieces the lengths that I needed. I also designed my control panels, which are removable. However, digitally, I don’t think I represented the aluminum tubes and rods that I used to attach the control panels to the layout. I also do not remember if I digitally created the drawers inside of Sketch-up. I may have. I will have to look. Maybe I did, because I think I found the slides for the drawers in the Online Objects Warehouse for Google Sketch-up. I remember the drawer slides had to be 24″ long so I had scouted these out at Lowe’s prior to buying them.

All of this brings me to the point that I am trying to make. The benchwork for the Libraryville layout didn’t get designed or built in 1 night. It took many months of planning, visiting Lowe’s to scout out available material, deciding on exactly what material to use, refining the design, and then combining the 2 separate Google Sketchup files so that I ended up with a file that had the digitized drawing of my library room to which I inserted the drawing of benchwork. In Sketchup, I am able to use their 3-D views to examine how the benchwork is to fit inside the room completely. I was able to measure the heights of my window ledges, space out where I wish to put a 42″ TV which was to be used to display a surveillance system of 7 cameras, 1 train cam above the layout, and video from a radio-broadcasting camera mounted on a train car. I designed exactly where to put that TV. I incorporated where the outlets are in my library room so that I had a plan for how to power up the layout. Nothing was left to chance. I worked on how I would access stuck or problem trains in the far, right corner of the layout and every other place on the layout if a derailment should happen.

You see the layout was to be placed against the walls with 3 of its sides being inaccessible by walking around it or standing behind it. The library room is small. Once the layout is in place, I would have very little room to move it and absolutely no way to physically get behind the layout if a serious problem occurs. It should be noted that after years of operating the layout downstairs in my living room, I have concluded that the Libraryville layout will most likely never be placed in the library room. Why? Because I have experienced numerous occasions when I have had to go to the far, right corner of the layout or go behind it while it is downstairs to address issues that could only be addressed by me physically getting into those positions. It would be an impossible nightmare to address those issues if the layout were ever put in its designated place by design. Even though I came up with methods to reach parts of the layout by getting underneath it and leaving only enough room to stick my arm up between the layout and the wall, my arm isn’t long enough to bend the way it would need to bend to try to address some issues. I have since designed a storage building where I wish to one day put the Libraryville layout along with other designed track plans and layouts. I dreamingly referring to that building as my Train Museum. The Libraryville layout will be accessible on all sides in my much larger Train Museum building alleviating the problems related to accessing it from all sides. I have also vowed to never design another layout that will get trapped by being designed to fit into places too small to accommodate necessary and appropriate access to all parts of the layout.

PLANNING how you are going to build a layout, or anything (really), is an absolute must. TESTING your planned design is even MORE important, because you may find that the completely finished railroad layout may not fit or work out as great as you envisioned.

Here is another HUGE lesson to learn: If you choose to collect model trains with the interest and intent of operating those trains on a layout, you need to get some track down (even if it is a temporary circle), put some trains on the tracks, and get them running on that basic layout as soon as possible. Additionally, as you are building your great model railroading empire, MAKE CERTAIN that you are able to operate trains on that layout as quickly as possible and all throughout the development cycle! Try not to have a section out of operating capability for too long and always have some tracks that you can run trains on. Why? I am here to tell you that the number 1 reason I have been able to get such great deals on entire train collections, is because previous train owners have set out to do great things by building incredible model railroads, bought all the things they needed upfront, but either never laid 1 single piece of track, or never got the layout to a point where they could enjoy seeing their collected trains running on even a simple portion of their master planned layout. They became frustrated or distracted. And they gave up long before their dream was realized. Life sets in. They get interested in something else, and before you know it, they have hundreds or thousands of dollars invested in a hobby of trains that they never or rarely get to enjoy. The next thing you know, they are up for sale to whomever will come get them and they’ll almost pay someone to come take them away or they’ll accept much less than they paid for them just to get them out of their way and out of their lives. Many people do not like to be reminded of their failed endeavors and when they get frustrated like this, that’s the reality of it. Sometimes they have help being reminded. Their spouse, siblings, or friends keep bringing it up and nagging them about “What are you going to do with all those trains you bought? Don’t you see now that you wasted a lot of money? You need to get rid of those trains! They are just taking up too much space and you aren’t doing anything with them.” Try not to get yourself into this situation. Build and expand as often as you must. Keep some operational tracks available all the time. BUT if you do get frustrated, tired, or are ready to get out of the model railroading hobby, don’t throw your trains away. Contact me and I’ll be happy to find a new home for your trains. You can either donate them to me or consign them with me/ShowMyHobby.com, and I will help get your trains to someone who will do their best to appreciate them and use them (for a while anyway. Their day may come too when their spouse comes home and asks, “Honey, what are you going to do with those trains?”)

It’s after 1 AM. I’ll have to resume this another day. All additional updates will be provided as posts to this main article.

Started: May 4, 2023. 1st Published: August 12th, 2023. Tags: Libraryville layout, HO scale model railroad, Henry’s Train Collection, Henry’s HO Train Collection.

Posted on

HO Sperry Rail Car Doodlebug

I found this Sperry Rail Car Doodlebug at a local antique store. To my surprise, it runs very well. It was made from a kit by someone else. I had some Christmas trains as well as some Metaltrain cars on my layout so I hooked it up to those while testing it. It struggled a little bit but it managed to pull 6 cars around my lower mainline loop on the my HO scale Libraryville layout. Pulling that load or just 3 of the Christmas cars it couldn’t make it up a 3 or 4 percent grade. No matter. Because I was surprised it ran at all, I grabbed my phone and took a video of it running around the track.

It would be 13 months before I finally finished posting the video to YouTube and my website.

HO Sperry Rail Car Doodlebug running on Libraryville 20201206 005805
Posted on

HO Athearn UP1943 Out of box Review

Well model railroad fans, this is a cruel review of a brand new, just received, right out of the box, HO scale Athearn Genesis Union Pacifc Heritage DCC-Sound Equipped SD-70ACe Diesel Engine Locomotive #1943. It was delivered on December 3rd, 2020, I opened it shortly after midnight on the 4th of December. I took it out of the box and placed it on my tracks. I grabbed my cell phone and started recording a video. I went over some brief details about the locomotive and I mentioned some new updates to my layout. Actually, the video was supposed to be about the new updates to my layout. I spoke to a friend and he wanted to see a video of the changes I made. Since the new locomotive came in, I decided I would film it as well as show the updates to the layout. My friend would get to see both at the same time.

What I didn’t expect was the locomotive not to move right out of the box. I had to push it to get it to start moving. Once I did that, it moved half-way around my layout. I stopped it. Then I turned the throttle up again and it wouldn’t move. This time, even giving it a push it would not move. I had to end the video the examine the locomotive further. I sat down and read the paperwork from front to back. In it, it has some troubleshooting tips. One of those is what to do if the sound works but the locomotive doesn’t move. It is recommended that I reset the locomotive to factory settings. So, I did that. It was successfully reset to factory and upon turning the transformer back on, after about 10 seconds, the lights blinked 16 times. This is an indication of a successful reset.

However, the locomotive still would not move. I took the shell off and tried to get it to move. It would not. I pressed down on the locomotive while it was on the tracks and the throttle was engaged. Finally, it moved. I let it run for 30 minutes at various speed-steps, but didn’t push it above 14 (using 28 speed steps). Then I ran it in reverse. I let it run until I became too sleepy to deal with it any more. I went to bed.

After a long day, I returned and with a little difficulty, I was able to get the locomotive to run again. This time, I let it run several laps around on speed-step 1. Then I did the same thing in reverse. I eventually after more than hour, increased the speed and ran it at speed-step 4 for a while. I lubricated the places indicated in the manual as points of lubrication. I did this by apply oil onto a toothpick and then placing the toothpick and the many points illustrated in the guidebook. I ran the locomotive both forward and in reverse for another 30 to 45 minutes. Eventually, I put the shell back on it and let it run for several more minutes in both directions. I had to push start it several times. So you can imagine my frustration. Eventually, it did perform better, but still, the locomotive should work flawlessly instead of picking and choosing when it wants to move and when it doesn’t.

HO Athearn Union Pacific UP1943 DCC-Sound Diesel Locomotive review -won't move right out of the box
HO Athearn Genesis Union Pacific Heritage SD-70ACe Diesel Engine #1943 running on Libraryville

Sadly, folks, after a day of resting, I tried to operate the beautiful UP #1943 again, and it wouldn’t move. I tried pressing down on it, giving it a push forward and backwards. It would not move in response to throttle commands. I reached out to the seller and the manufacturer. I will update you as to the outcome of this locomotive once the issues has been addressed by one of them. 12/7/2020 – Henry

Posted on

HO Seaboard Air Lines

Being a model railroader from Belmont, North Carolina, it would be neglectful of me to not collect and operate one of the main lines that used to run through even my hometown. Seaboard Air Line’s main line ran from Richmond via Raleigh, North Carolina, Columbia, South Carolina, and Savannah, Georgia to Jacksonville, Florida, a major interchange point for passenger trains bringing travelers to the Sunshine State. From Jacksonville, Seaboard rails continued to Tampa, St. Petersburg, West Palm Beach and Miami according to Wikipedia (you can read more via this link).

I recently acquired 2 InterMountain Railway Company FT-A and FT-B Seaboard Air Line units, model number 49228 as a set with road numbers 4021 and 4121 included. These are DCC equipped units. I paired them with 2 previously purchased unpowered dummy Life-Like Proto 2000 FB-2 Units. The detailing on all these locomotives is extremely good.

I have an interest in putting sound in at least one of the units if not all of them over time. Therefore, these locomotives are being considered as yet another HJR project. Today, October 31st, 2019, I just want to get some of the pictures online and maybe even a short video so that InterMountain can see the units I’ve written to them about. I will return later, add more pictures and videos, along with an Atlas SAL switcher that I have, and update this page on the progress of getting a full SAL train running.

March 12, 2024. I noticed a couple weeks or months ago that somehow the Seaboard Coast Line passenger cars started showing back up for sale. They are NOT for sale anymore as I purchased them from the consignor. I have ordered and received a lot of upgrades for the SCL passenger car set plus added some additional cars. It may take me a while to bring you up to speed. For now, though, I want to delete the active listing for the sale of the items and move the content of that product listing to this page, because it lists the original 9 passenger cars and provides some individual pictures of the cars. It also has an early video of the trains running on my Libraryville layout.


Here we have a Used Athearn Seaboard 9-piece Passenger set.  The cars are equipped with truck-mounted sprung Kadee couplers and Seaboard Coast Line’s Silver with Black lettering paint scheme. This set also comes with 1 bonus Silver and Brown Seaboard Coast Line boxcar (actually making it a 10-piece set)

The passenger cars are made of sturdy injection molded plastic.  They come with low-profile wheelsets that have 2 metal wheels on one side of the truck and 2 plastic wheels on the other side of the truck.  (This is done to accommodate acquiring power from the track should one wish to upgrade these cars with lighting kits.  Additional customization will be needed to do that as well.)

This set is used and ran very well on the MMRR layout during the Asheville Train Show in March 2018 as well as on my Libraryville layout (featured in the video).  Some of the cars in this H O scale passenger set were also run for about 30 minutes during the Gastonia Train Show in July 1st, 2018.

Note:  There is some visible glue on some of the cars especially where the windows were glued into place when the kits were assembled. This doesn’t affect the performance of the cars. They still look good rolling on the track (as you can see in the video)

Below is a list of the cars included in the set.  Bev-Bel painted these cars using Athearn stock passenger cars.

ManufacturerItem No.Car Type, Name or Road#
Bev-Bel Corp Streamline Coach Passenger Car #6005
Bev-Bel Corp5910Baggage Car #6050
Bev-Bel Corp5911Baggage Car #6203
Bev-Bel Corp5912Streamline Coach Passenger Car “Seabring”
Bev-Bel Corp5913Tapered-End Observation Coach Passenger Car #6401
Bev-Bel Corp Vista Dome Coach Passenger Car “Atlanta”
Bev-Bel Corp Streamline Coach Passenger Car “Miami”
Bev-Bel Corp5916Streamline Coach Passenger Car “Ocala”
Bev-Bel Corp Streamline Coach Passenger Car “Tampa”

The Bonus Car, SCL 50-ft Box car #821600  by Bev-Bel from RoundHouse Kit #1207 with .039″ wheelsets, is not one that I purchased from the Consignor, so that car is not part of MY SCL Passenger Train Set.

NOTE: This set includes 9 passenger cars. A locomotive did not come with this set. As mentioned above, I acquired my locomotives separately.

Athearn EMD GP38-2 Seaboard System (SCL) Diesel Engine HO scale pulling 9 Passenger Cars

Original Photo Gallery of the 9 Seaboard Coast Line Passenger Cars:

Posted on

HO HJR SOFTWARE 50′ CSD Boxcar

HJR SOFTWARE (HJRS) is a small computer-business in Belmont, North Carolina. The HO 50′ CSD Boxcar will be an advertising piece for that business. In the real world, HJRS doesn’t have any need to have a real locomotive or any other real train car. As a model railroader, I create layouts that represent fictitious locations. As a hobbyist, I operate model trains. I’m a member of a the Metrolina Model Railroader’s club. Since I spend a good bit of my non-working hours operating model trains, I feel it would be a good way to continue promoting my computer business by placing the company’s name, phone number, contact information, etc. on a complete set of trains. When I joined the train club, I mentioned it might be a good way to help supplement the train club by allowing local businesses to advertise on the club’s layout like sponsors. For many reasons, the club doesn’t like this idea and so it hasn’t been implemented. However, for my own layouts, I choose to incorporate the names of things that are dear to me and HJRS is just one of those things. On one layout I have streets named after family members, business buildings with my own family name on them, etc. In 2018, I decided to make an entire HO scale train set consisting of a locomotive and 7+ cars. The Plus is growing. Some of the train cars were already made cars that were not in the best of shape representing whatever road names were originally on them or they needed a lot of repair. I decided to paint those cars a unique way. Other train cars I built from kits and painted them to be part of the HJR SOFTWARE Train Set. When the CSD offered a box car, I decided to dedicate that car as one of the HJRS train cars and the first one to actually receive the HJRS logo and other signage.

The CSD Boxcar project started the 3rd week of June, 2019 when I attended the CSD meeting where incidentally, I also received the NMRA Golden Spike certificate (I will blog about this eventually). Participating CSD members received the undecorated 50-foot boxcar shell as we were taught how to use a airbrush. For many, this was just additional information to a skill they were already quite familiar with. Although I have several airbrushes, as of late, I haven’t been able to put my hands on them (I’ve misplaced them). I only attempted to use them twice and not with very much success. I did however have some success with buying a Testor’s aerosol airbrushing kit and painted a custom-built covered Hopper for the HJRS Train Set several months earlier. The airbrushing sessions was a real treat for me and I learned quite a bit. Now if I can just find my airbrushes I might be able to use them better henceforth.

I didn’t take any photos of the unpainted boxcar shell when the CSD handed them out to us. I did take some photos after the airbrushing session and then again almost a month after the decal session. Those photos are in the gallery listed below:

On or shortly after the last CSD session in this series, I will post additional photos and comments on the finished boxcar. Now that I have the first set of HJRS decals printed out, I will also be applying the decals to the other train cars in the set and creating posts for those projects as well.